This article is a step-by-step to learn how to manage your domain zone record, this article assumes you are using the cPanel host nameservers as that is the only way you manage these records within your cPanel.
- Inside cPanel, we click on the Zone Editor button under the Domains header (see image below)

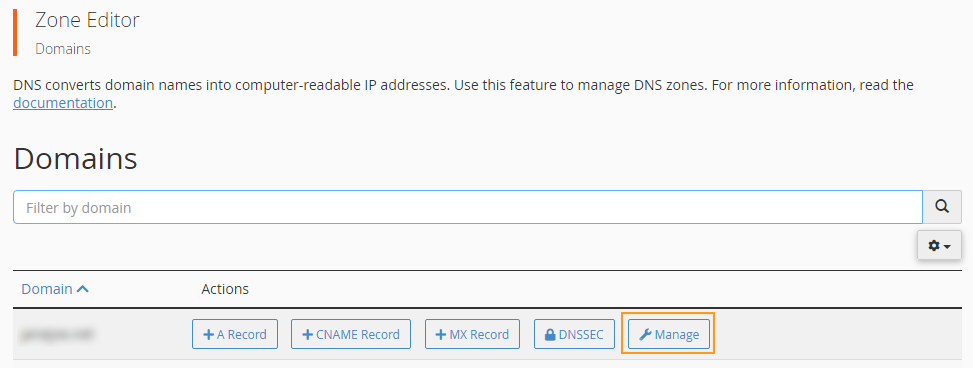
- Next, we will click the Manage button with the wrench symbol next to it, this will open our Management interface for the domain we’re selecting. (see image below)

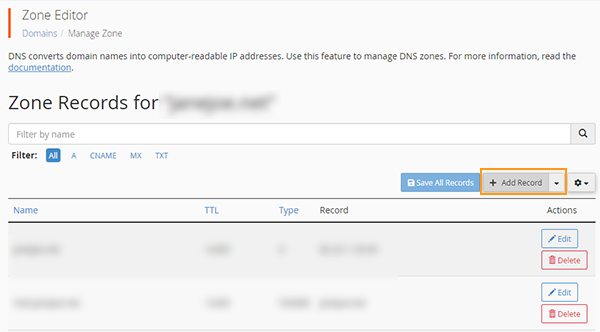
- We will start by clicking the +Add Record button as this will add a new empty record to the set. (see image below)

- In my example I am going to be adding an MX record, this is purely for showcase purposes. You fill in the details required, the Name, TTL, Type, and the Record information. (see image below)

- Once you are done you click Save Record and that is it, you have now added a record to your DNS Zone Manager.
