Here are the step-by-step instructions on how to install LiteSpeed Cache for WordPress (LSCWP).
Before we start, this article is suitable for the LiteSpeed webserver, which OrangeWebsite shared hosting is operating on.
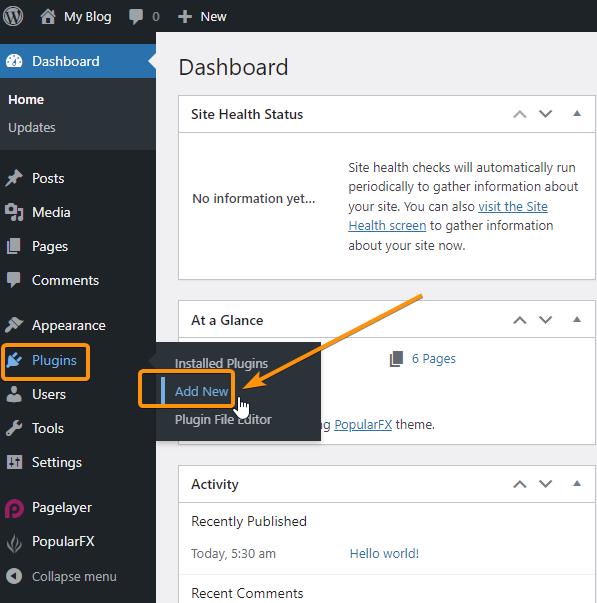
- Log into your WordPress dashboard and navigate to the Plugins section, where it will expand, and you’ll have a choice to click on the Add New link.

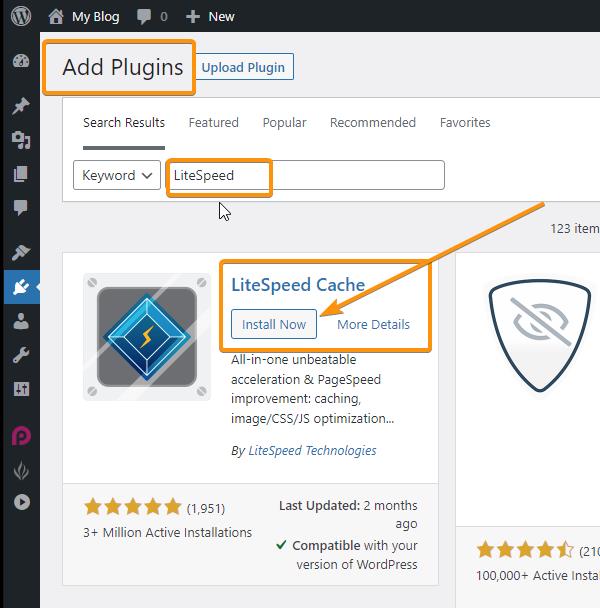
- This will take you to the Add Plugins Page. in the Keyword search box, search for LiteSpeed. LiteSpeed Cache will then display, and you can then click on the Install Now button.

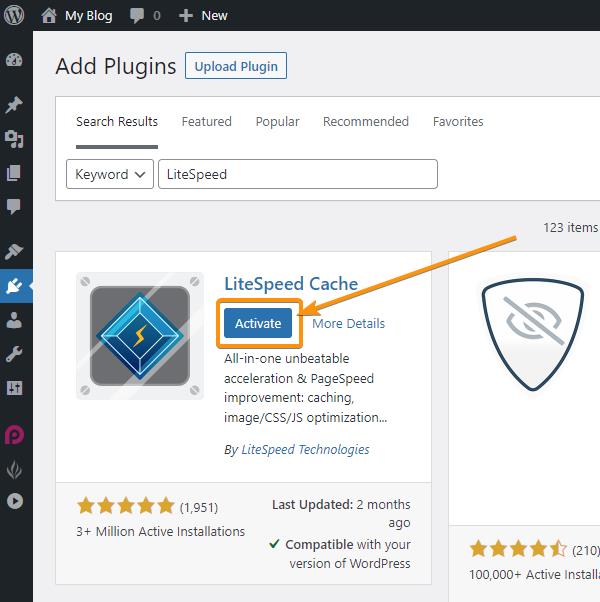
- Once installation is complete, click on the Activate button to activate LiteSpeed Cache.

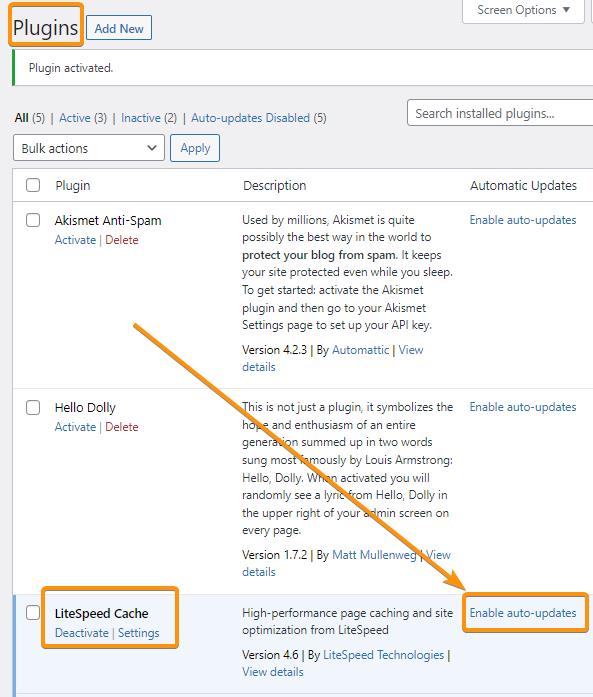
- Once activation is complete, you will be taken to the Plugins Page. On this page, it’s recommended for you to click on the “Enable auto-updates” link.

- The default settings have been shown to significantly improve performance in terms of page load speed. Going through each possible option is beyond the scope of this tutorial. However, you can find more information about LiteSpeed cache settings directly from LiteSpeed’s Beginner’s Guide to LiteSpeed Cache for WordPress page.
