
This article is a step-by-step to learn how to enable/disable the SpamExpert filter on your account. This filter is of the highest quality and allows you to filter incoming spam efficiently.
Enabling the SpamExpert Filter
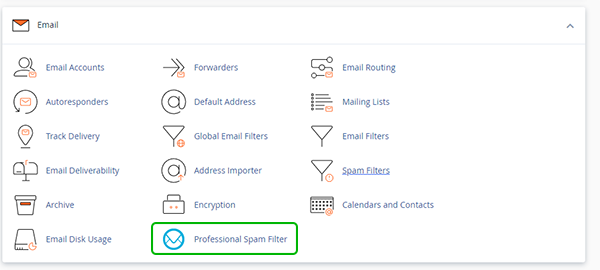
- Inside cPanel, we click on the Professional Spam Filter button under the Email header (see image below)
- Next, we will select the appropriate domain (if we have multiple). By clicking the Login button next to it (see image below), you will perform a DNS zone update in the back where the MX records are updated automatically to the following:
mx1.sf.ice-networks.com
mx2.sf.ice-networks.com
mx3.sf.ice-networks.com
mx4.sf.ice-networks.com
What this does is ensure all emails delivered to you go through the filter first for screening and then to your mailbox.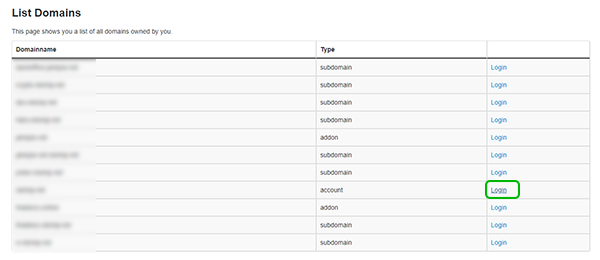
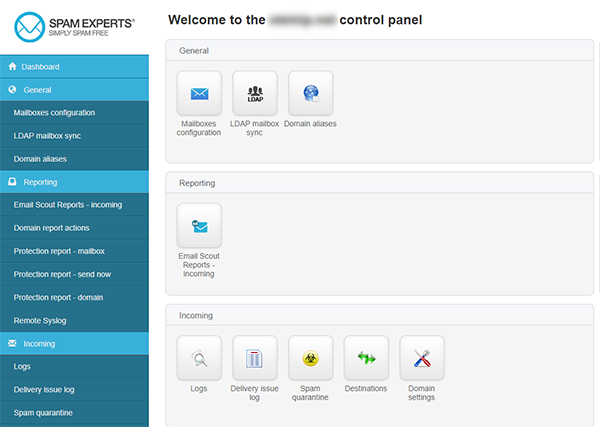
- Once on this page, you can click Logs in the Incoming header if you wish to start viewing your logs, and see incoming emails, you can click the Spam quarantine to check if any emails you were expecting and have not been delivered got caught in the filter as false/positive.
Disabling the SpamExpert Filter
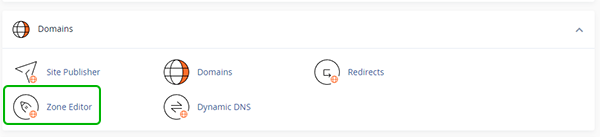
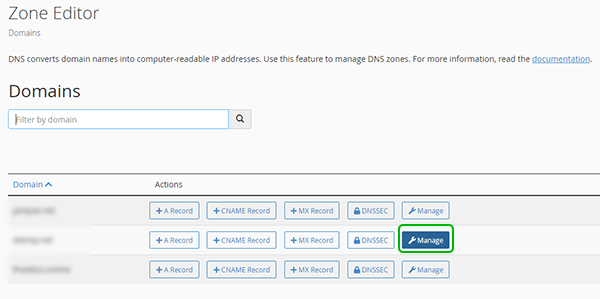
- Inside cPanel, we click on the Zone Editor button under the Domains header (see image below)
- We then click the Manage button next to the domain we wish to disable.
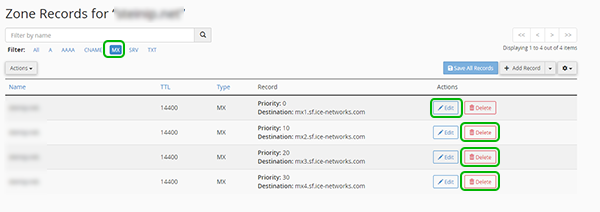
- On this page, let’s click on the MX button to filter by the MX record only, and it should look something like the image below, 4 records pointing to mx1-mx4.sf.ice-networks.com. We delete all the records with Priority higher than 0 and then click the Edit button for the last record with the Priority 0 next to it (see image below)
- We will update the mx1.sf-icenetworks.com to your domain, so let’s say your domain is johndoe.com, then put johndoe.com in the destination and click Save Record
(Note: If you are behind Cloudflare, you would put the server hostname i.e jolnir.orangewebsite.com as the Destination because your domain name would point to Cloudflare, not to the server IP)
- Once you have done this, you no longer funnel your incoming email through the filter
(Note: We scan all our client outgoing email to prevent outbound spam, this is not possible to turn off and it wouldn’t be turned off, you only have control for the inbound email protection)