This article is a step-by-step to learn how to create a MySQL database and assign a MySQL user to the database. We will be going through two methods starting with the Wizard.
MySQL Database Wizard (Create database and user)
- Inside cPanel, we click on the MySQL Database Wizard button under the Databases header (see image below)

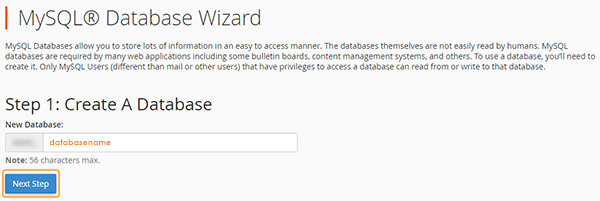
- Next, we will fill in the database name we will be using for our database, all databases will start with your username’s 8 letters (ex: davideci_<databasename>). Next click the Next Step button (see image below)
- Once on this page, we will fill in the username for the database connection, again same rules apply when creating the user, it will start with your first 8 account username letters.
You can click the Password Generator to help you with your password, once you have selected the password click the Create User button. (see image below)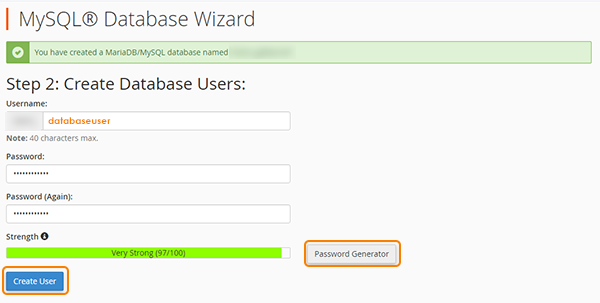
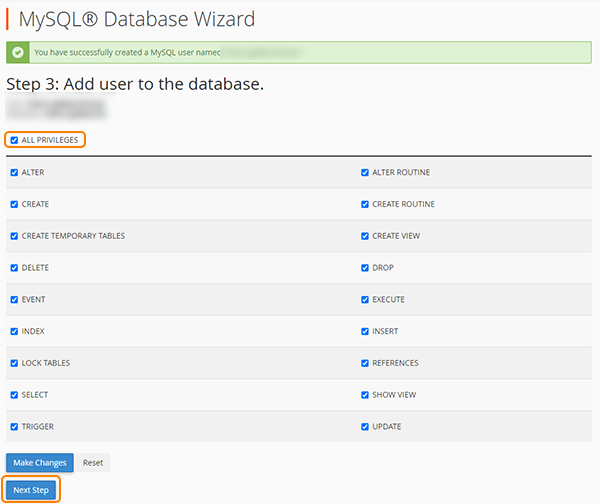
- On this page we’re setting the appropriate permissions for the username attached to this database, in general, we simply select ☑ All privileges which allow for everything. If you are not sure about the privileges especially if you have a WordPress application, make sure to select them all and then click Next Step
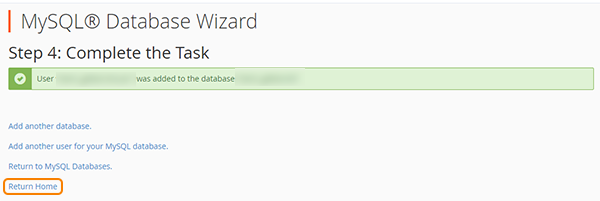
- You are all done as shown on the screen below, you now have created a database, associated a user with it, given it privileges and you are ready to connect it up in your application.
MySQL Databases (Create database and user)
- Inside cPanel, we click on the MySQL Databases button under the Databases header (see image below)

- Unlike the Wizard approach whic is a step by step all the way through, you can create a database, create users and wide variety of other configurations on this page. In this single step we’re going to quickly runthrough the wizard steps, you can create a database only by simply filling in the fields as shown below and clicking Create Database

You can create a user seperately using the fields shown on the page, using the generator to ease you with the password, and finally clicking the Create User (see image below)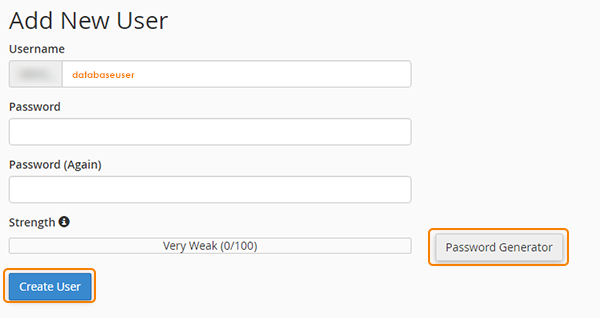
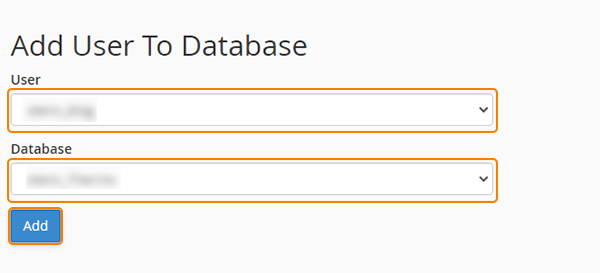
- Now that we have created the database and the user, we need to add the user to the database, to do that we scroll further down right under the Add New User and find the Add User To Database, it looks like the following (see image below), you select the newly created user and the newly created database and click the Add button
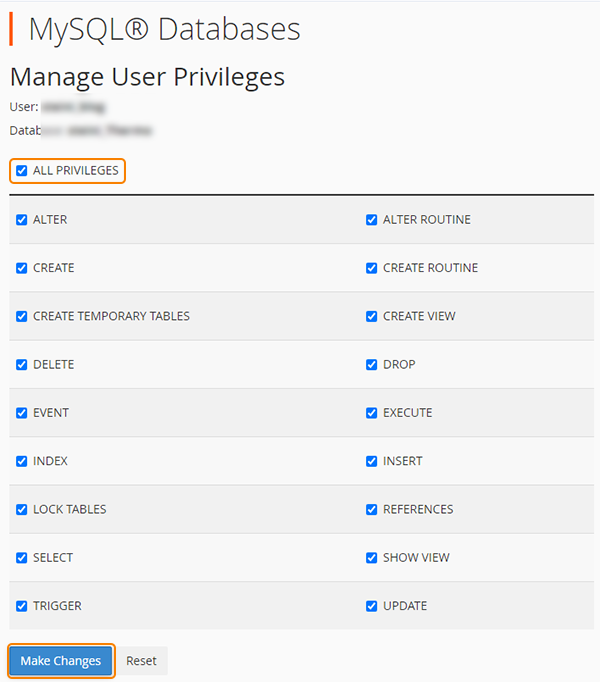
- On this page we’re setting the appropriate permissions for the username attached to this database, in general, we simply select ☑ All privileges which allow for everything. If you are not sure about the privileges especially if you have a WordPress application, make sure to select them all and then click Make Changes
- You have now successfully created the database and user seperately, adding the user to the database. You can create multiple users and assign them to one particular database or you can create multiple databases with a single user.
NOTE: You should be careful with creating multiple databases with single user, if the password is ever compromised all your databases would be compromised instead of the one.
