This article explains how to clear the DNS Cache of a variety of operating systems. This is a useful tool to sometimes refresh your DNS cache when you have updated your DNS zone.
Windows 8 and 10
- Press the ⊞ + X (Windows key) to open the WinX Menu.
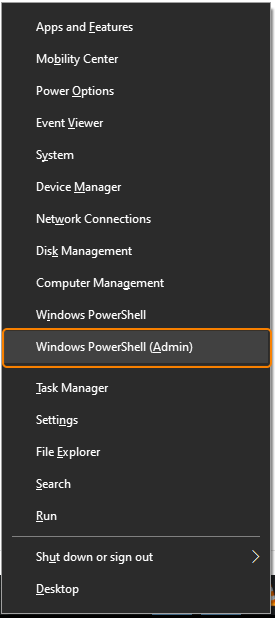
- Click on the Windows Powershell (Admin)
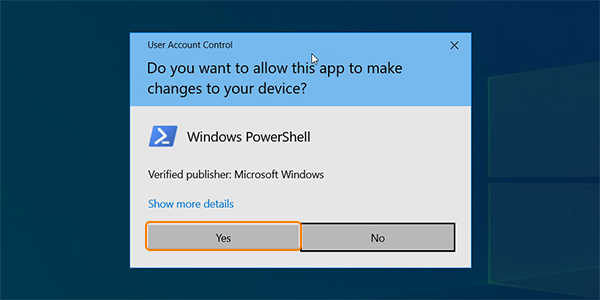
- Click Yes to the UAC that pops up.
- In the command line, type the following:
ipconfig /flushdns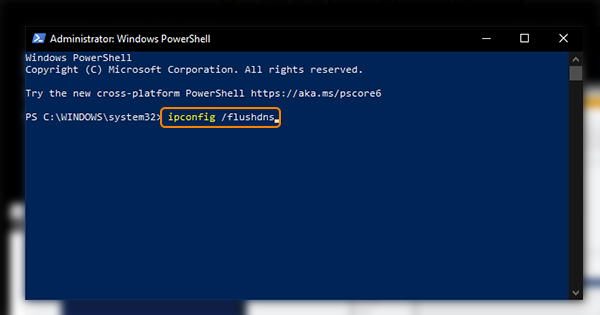
- If the command was successful you will see
Windows IP configuration successfully flushed the DNS Resolver Cache.
Windows 7
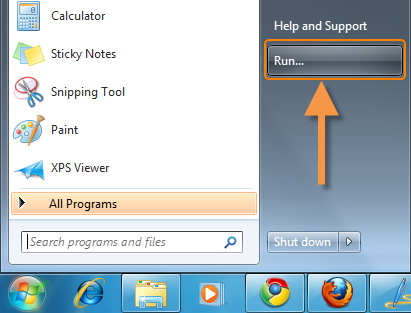
- Click the Start button, in the taskbar (bottom-left)
- Click the Run button on the right (shown in the picture below)
- A dialog box will open (see picture below), in the box type
cmd
and hit the OK button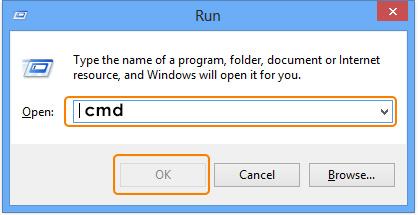
- In the command line we want to write the following command
ipconfig /flushdnsand then we hit the Enter key.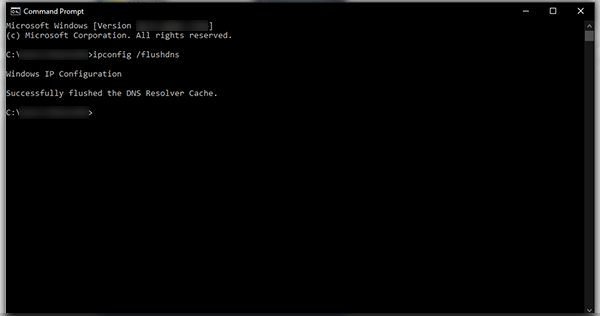
- If the command was successful you will see
Successfully flushed the DNS Resolver Cache.
Windows XP, 2000 or Vista
Please review Windows 7 above, as it will apply to previous versions down to Windows XP.
macOS (Monterey, Big Sur & other flavors)
- Click the Spotlight search button or use Command + Space to do a search
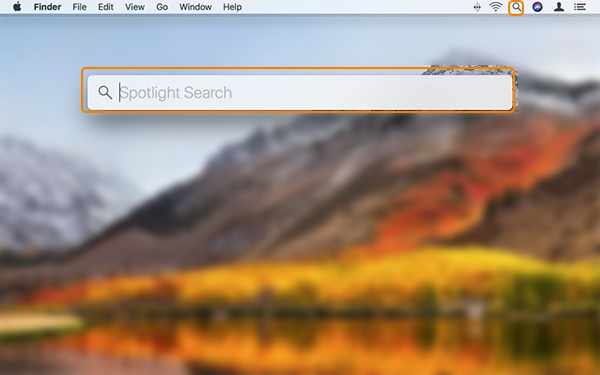
- Type
terminalin the search bar and locate the terminal icon and click it to open up the terminal (shown in the picture below)
- Once you got the terminal open, you will type the following command for various Mac flavors
Monterey & Big Sur:sudo dscacheutil - flashcache; sudo killall -HUP mDNSResponder
After hitting enter, you are asked to insert your password, which you do to execute this command.
El Capitan and newer:sudo killall -HUP mDNSResponder
Yosemite:sudo discoveryutil udnsflushcaches
Lion, Mountain Lion, Mavericks:sudo killall -HUP mDNSResponder
Snow Leopard:sudo dscacheutil -flushcache
Leopard:sudo lookupd -flushcache
Tiger:lookupd -flushdcache
