
WordPress is known to be a heavy user of your resources like PMEM (Physical Memory), I/O, IOPS, EP, and NPROC. To help reduce WordPress Memory Usage you can disable the WordPress cron and enable the cPanel cron instead.
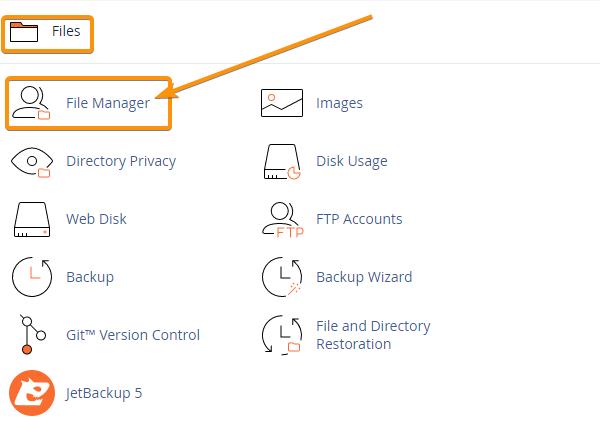
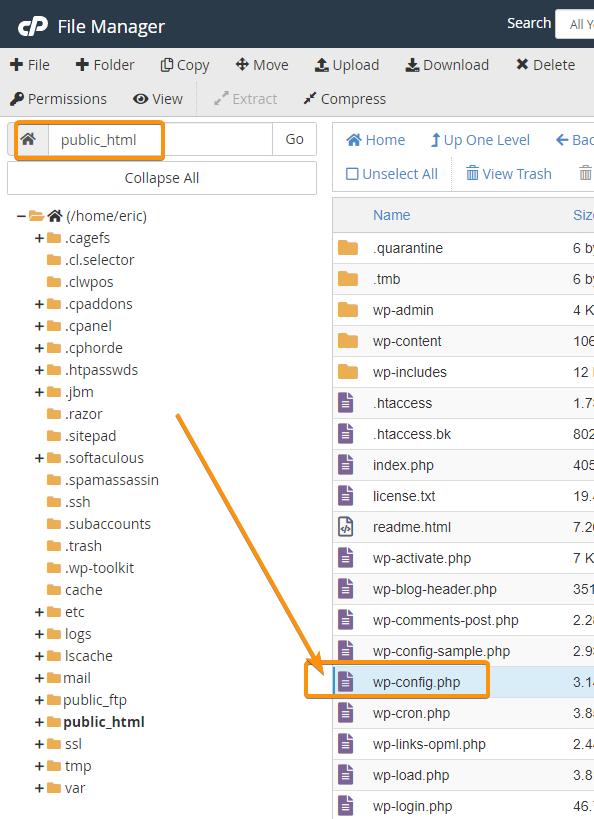
- Disable your WordPress Cron by editing your wp-config.php file. You can do this by logging into your cPanel, navigating to File Manager then opening your /public_html directory. In this directory, you should see wp-config.php
- Next, open wp-config.php for edit. adding one line of code to your wp-config.php file. Paste the following line.
define(‘DISABLE_WP_CRON’, true);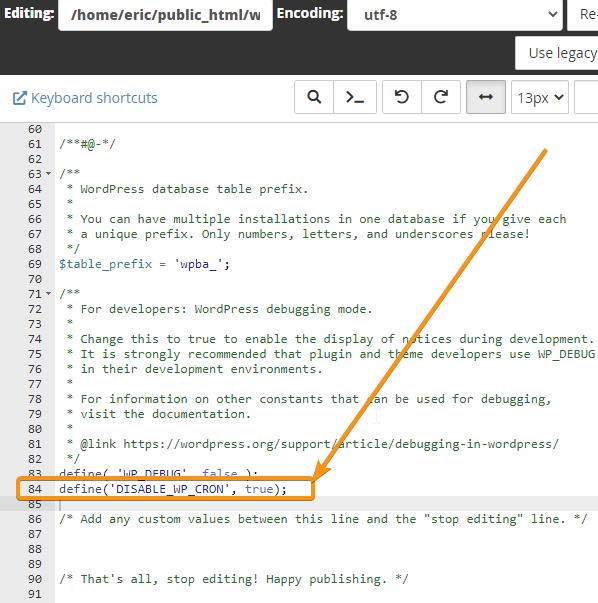
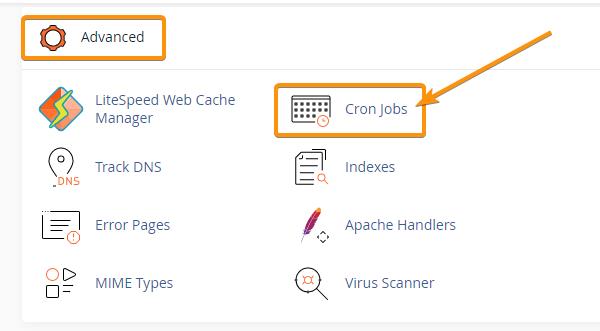
Now wp-cron.php will no longer load every time someone loads your pages and ensure that no cron-related work is done in any user request. This will reduce some MySQL database queries also. - Next, log in to your cPanel account, find the Advanced panel and click the Cron jobs.
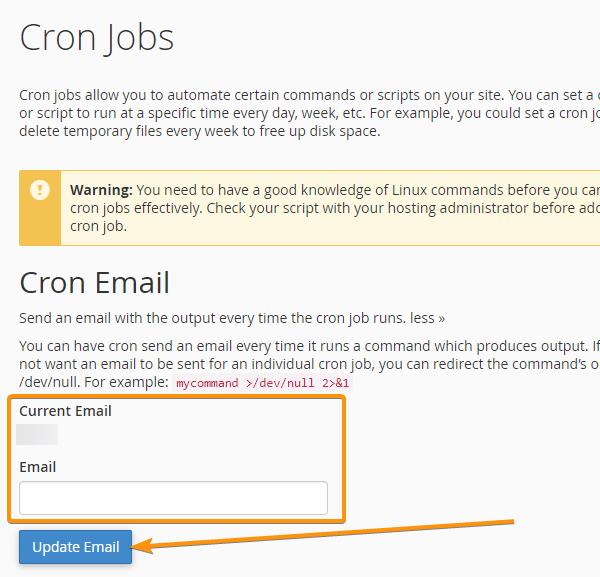
- The cPanel Cron Jobs page will load. Verify that the current email address is one that you can check. You can change it here and then click on the blue Update Email button.
- Scroll down to the Add New Cron Job section, and choose the interval that you want to run the cron job. In the Minute field, I have set it to run every 15 minutes and leave blank Common Settings, Hour, Day, Month, and Weekday fields. But you can change it according to your liking.
In the Command field, enter the following line.
wget -q -O – http://domain.com/wp-cron.php?doing_wp_cron >/dev/null 2>&1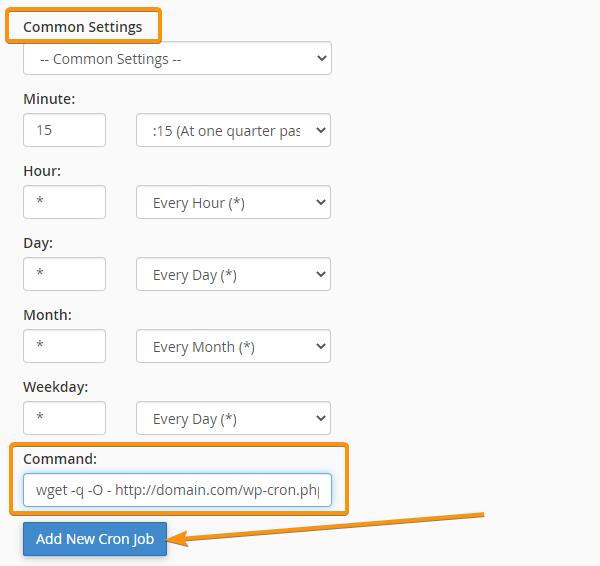
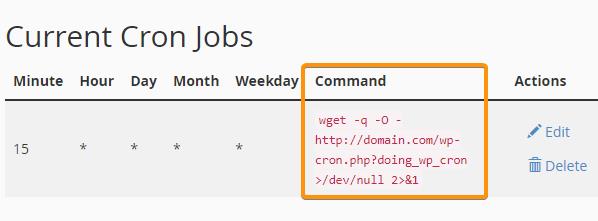
Don’t forget to replace domain.com with your blog URL and click the Add New Cron Job button. - After you click on the Add New Cron Job button, you will get a confirmation and the Current Cron Jobs section on this page will look like this:
- Additionally, it’s recommended that you also install LiteSpeed Cache for WordPress (LSCWP). You can find instructions on how to install LSCWP at this link.
If these recommendations do not solve your memory usage issues, you have two other options.
Option 1. Log in to your Orange Website Client Area and create a technical support ticket asking for a Double Your Resources Package. The cost of the package increase is approximately half of the hosting package.
– CPU 100% → 200%
– PMEM 1GB → 2GB
– IO 2MB/s → 4MB/s
– IOPS 1024 → 2048
– EP 20 → 40
– NPROC 100 → 200
Option 2. Upgrade to either a Cloud VPS or Dedicated Server Hosting Plan.