Here is a step-by-step on how to add the domain to your account, this requires that your account is allowed to manage more than one domain.
- Inside cPanel, we click on the Domains button under the Domains header (see image below)

- On this page, we first need to click Create A New Domain blue button on the right hand of the screen. (see image below)

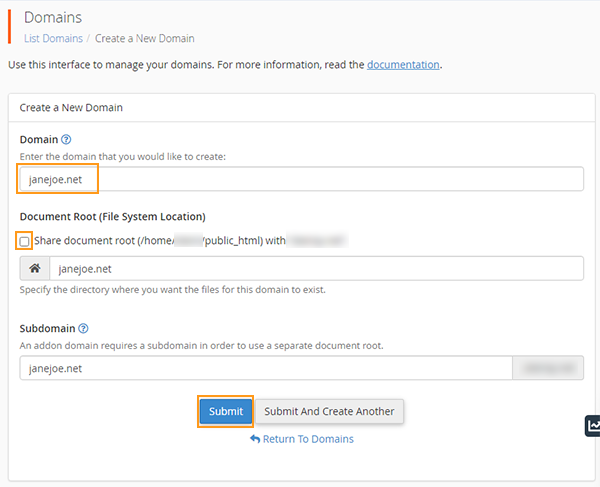
- We need to fill in the domain information of the addon domain which we’re going to be adding to our profile, in this example, I will use janejoe.net. (see image below)
Because this is not the primary domain on your profile, this will be an addon to your profile.
- We will fill in the domain name, we will uncheck the Share root button (we do this to prevent the new domain to reside in the same folder as your main domain. This will prevent access to your domain through let say johndoe.net/janejoe.net)
Once you have filled everything in and the home directory we can click Submit
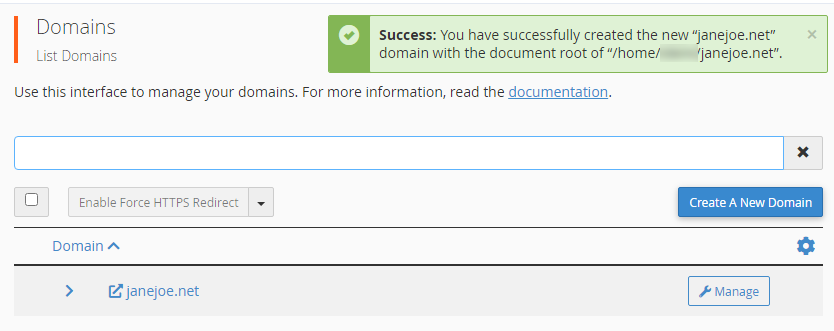
- If everything is successful you will receive a green Success message indicating so. What you need to do now to make your domain resolve is to either
a) You set the domain to its relevant nameservers issued with your hosting server
b) If you use 3rd party DNS service such as CloudFlare you need to set the A record for the domain to that of your hosting server and ensure that the cloudflare settings is off (Orange Sky is Grey) so that the hosting server can resolve the domain to the server IP.
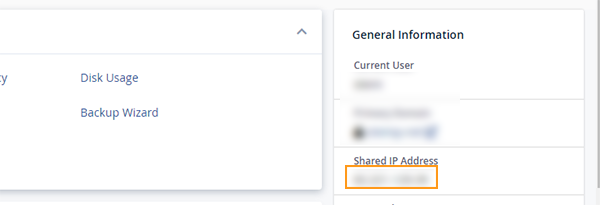
If you aren’t sure what the IP is you can find it on your cPanel main screen on the right hand (see image below)
- That is it, you have now successfully connected your domain to your cPanel account.
